Automated AI Voices
You're own AI voice model, as easy as 1, 2, 3.
Overview
Intro
Retrieval-based Voice Conversion (RVC) is a type of AI model that can change one voice into another or help voice text to speech. This powerful technology is open source. This means that anyone can create their own unique voices on their own computer. The main concerns are that of ease of use, practically, and model quality. Can we find a way to make training automated and produce high quality results with no programming? With new open source tools, yes.

Tools Used
( All open source )
| Tool | Description |
|---|---|
| NeMo | Diarization (Determining speakers in an audio file). |
| WhisperX | Transcription and VAD Generation. (VAD is used to determine cut off points for audio segments). |
| FFmpeg | Manipulating audio files. |
| Spacy | Comparing typed lines vs transcribed lines. |
| Ultimate Vocal Remover | Removes background music from audio files. |
| RVC Training and Inference | A forked repo (original here) modified by Jarod Mica that makes RVC training and inference simple. |
Automating the Data Prep
Running Automated Speaker Extraction
What’s the best way to automate data needed for training RVC? With AI of course! This github repository built myself will utilize diarization. After installing a few prerequisites programs, all that is needed on our end is a file containing audio and to specify lines spoken by our desired speaker in the Excel file in the github repository.
Prerequisite programs:
- Install Cuda for Windows
- Install WSL for Windows
- Install Cuda for WSL
- Install Miniconda (other Python managers work aswell)
Let’s set up the repository. Abbreviated usage instructions can be found on the github repository’s readme
Open up a command line terminal. A shortcut to do this on Windows is to navigate to the desired folder and type cmd in the explorer window, as show below.
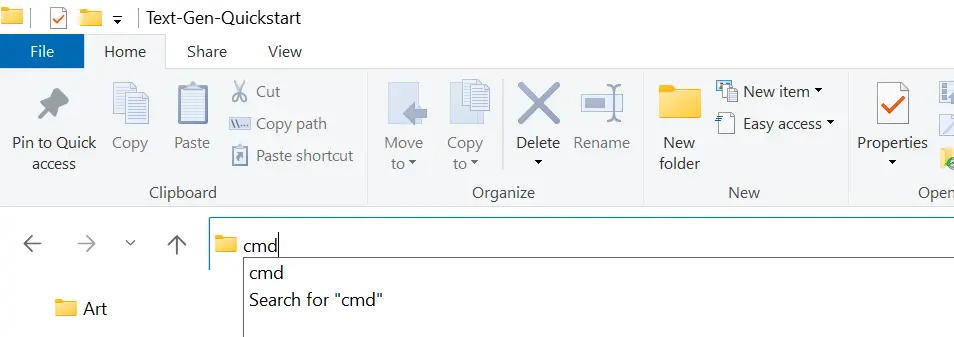
Paste the command line terminal.
git clone https://github.com/ProtoPompAI/Automated-RVC-Data-Preprocessing.git
conda create -n Automated-RVC-Data python=3.10 -y && conda activate Automated-RVC-Data
pip install -r requirements.txt
Whenever you want to use the program, be sure and type the command conda activate Automated-RVC-Data first. This will activate the Python environment that contains all of the packages needed to run the program.
Create a directory with files with some sort of audio. One way to get some example audio is to use yt-dlp on a long video Youtube videos such as public domain TV Shows. One such example is the first season of the The Beverly Hillbillies.
The next step is fill out the Excel file included in the cloned repository as shown in the below image. More information on the columns can be found in the Excel comments indicated by the top right red triangle.

After the Excel file is completed, you want to run the command line script as shown below.
python preprocess_data.py INPUT_AUDIO_DIRECTORY OUTPUT_LOCATION --speaker_label SPEAKER_LABEL --specification_file SPEC_FILE -k
After this script is complete, there will be a folder with the extracted audio for the given speaker label in the Excel file. This audio is ready to be put through Ultimate Vocal Removal 5.
Removing Background Music
The next step is to download and install Ultimate Vocal Remover GUI from github
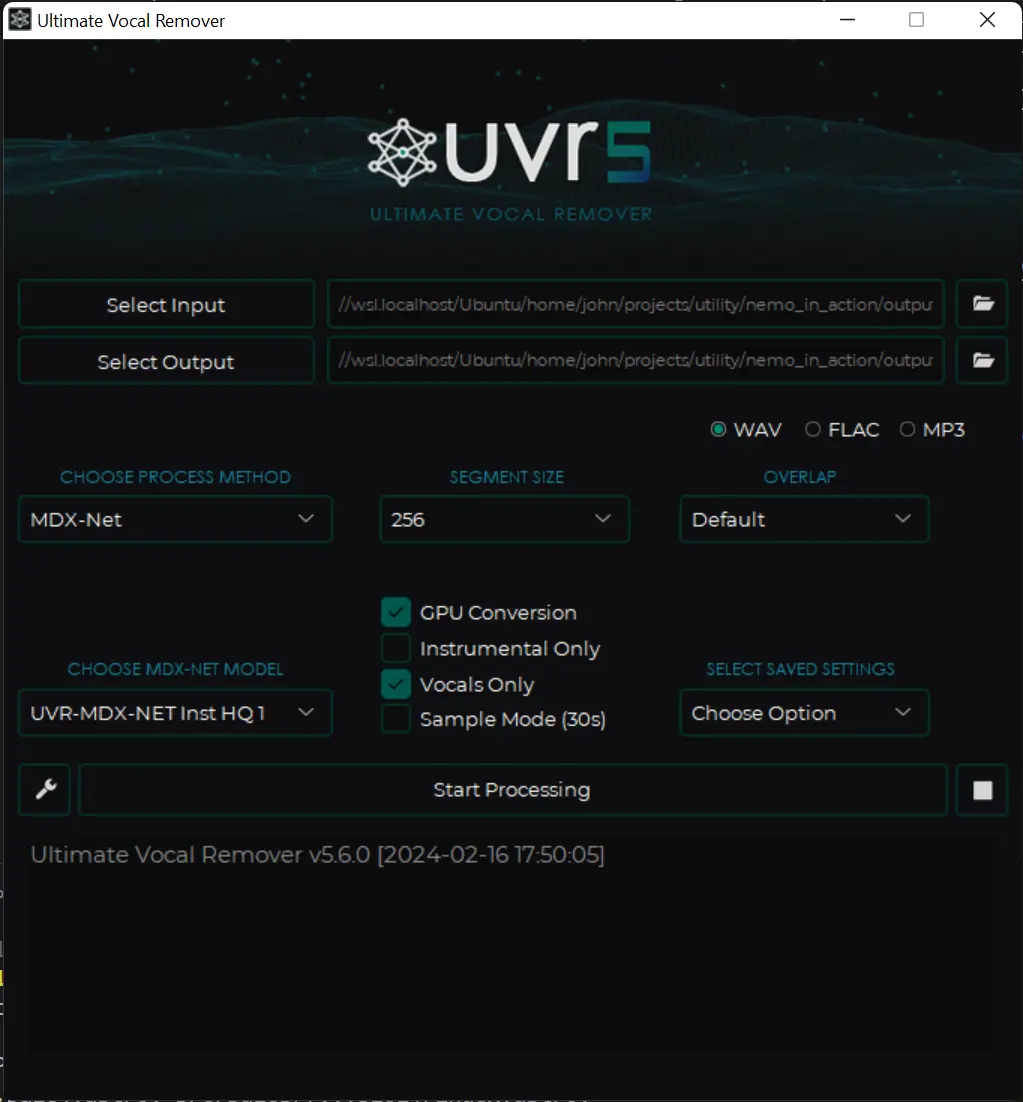
Defaults can be kept the same, apart from selecting the checkbox Vocals Only for convenience. All that needs to be done is to select input (the automated speaker extraction), select an output folder, and press enter. After a few minutes, the processed results will appear in the final folder.
RVC Training
After removing the background music, the next step is to download RVC WebUI. After this program is downloaded, unzip the archive and run go-web.bat. A web browser should pop up. Navigate over to the training tab.
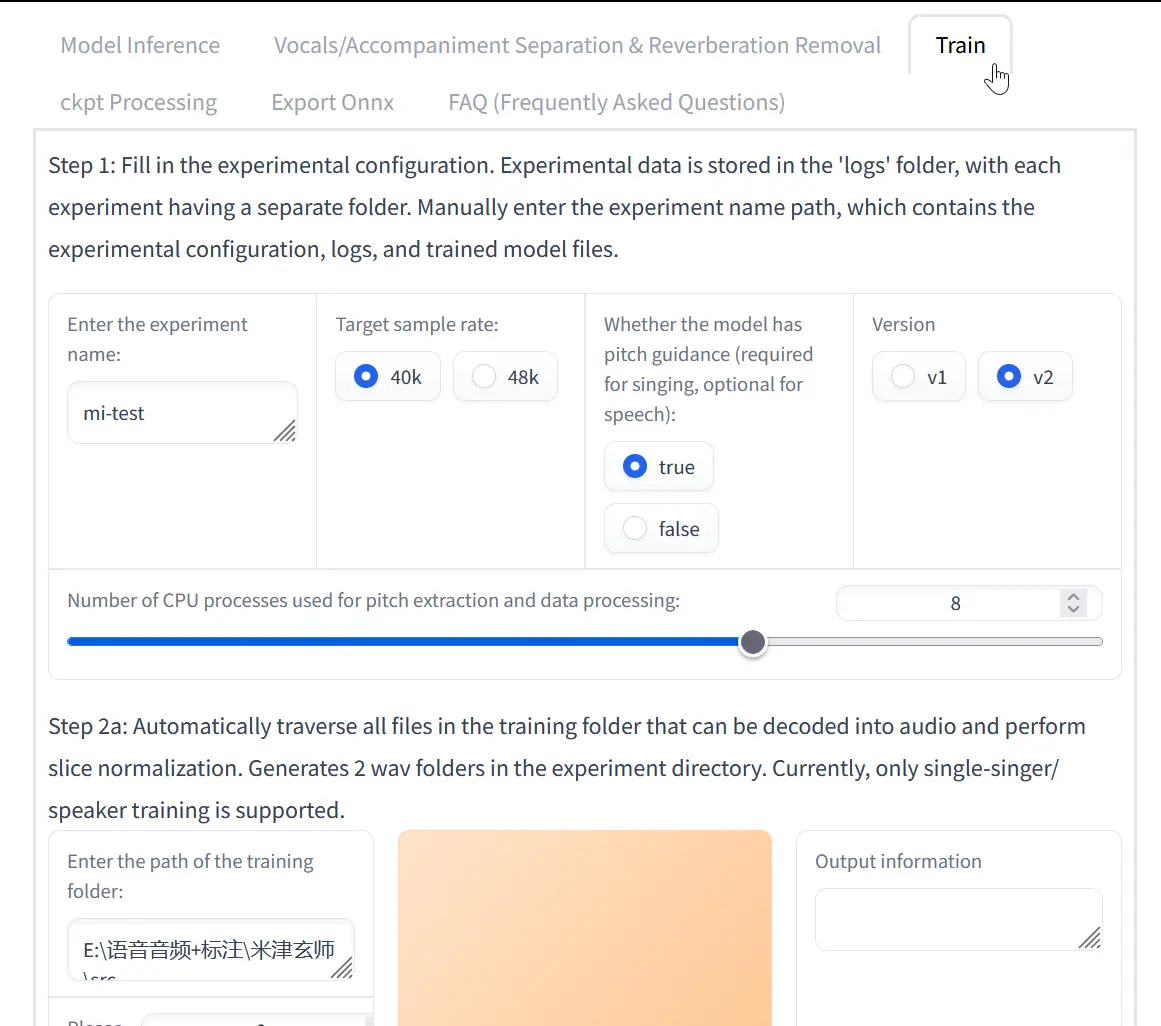
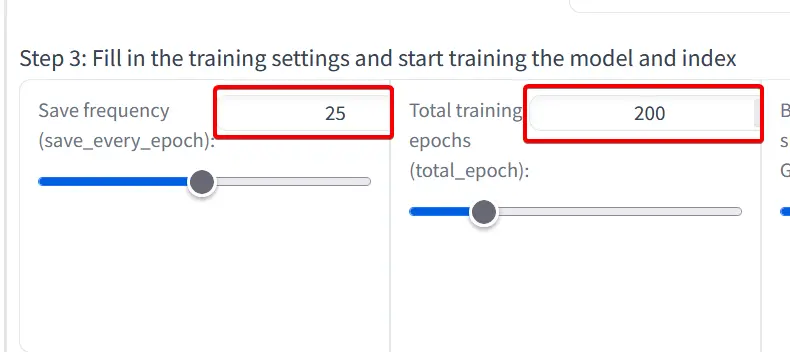
For an initial run, standard the defaults can be kept. I do recommend turning up save frequency to 25 and epochs trained to 200 to ensure that the model has enough time to train well.
Inference
After training, inference can be done on the first tab of the WebUI. There are also parameters the can be adjusted. Try tuning these to get the best output. And just like that, the AI voice model is complete.